
Page metadata (Head)
Page metadata describes a Page to the browser and services that read its HTML. Use Head to set the browser-tab title, a description and document links such as a canonical URL.
How Head works
Head saves elements alongside the Page's visible Body. Title and Meta describe the document; Link declares a relationship to another resource. Preview and Prerender use these saved values, and publication includes the values from the version you publish.
Datavju supplies a UTF-8 charset and a viewport using the device width and initial scale 1. Set each Page's own Title and description. The Site's General Title and Description describe the Site settings and do not fill these Head elements automatically.
Set the browser title
Title supplies the browser-tab text; the visible Heading supplies the title people read on the Page.
- Open the Page and choose Head in the Story toolbar.
- If Head is empty, choose Add Head Component.
- Open the Head row's menu and choose Add Title.
- Expand Head and select Title. In Text, enter Northstar lighting — Desk lamps and pendants.
- Open Preview and check the browser tab's title.
Add a description
Keep the summary specific to this Page so readers of its metadata can distinguish it from the rest of the Site.
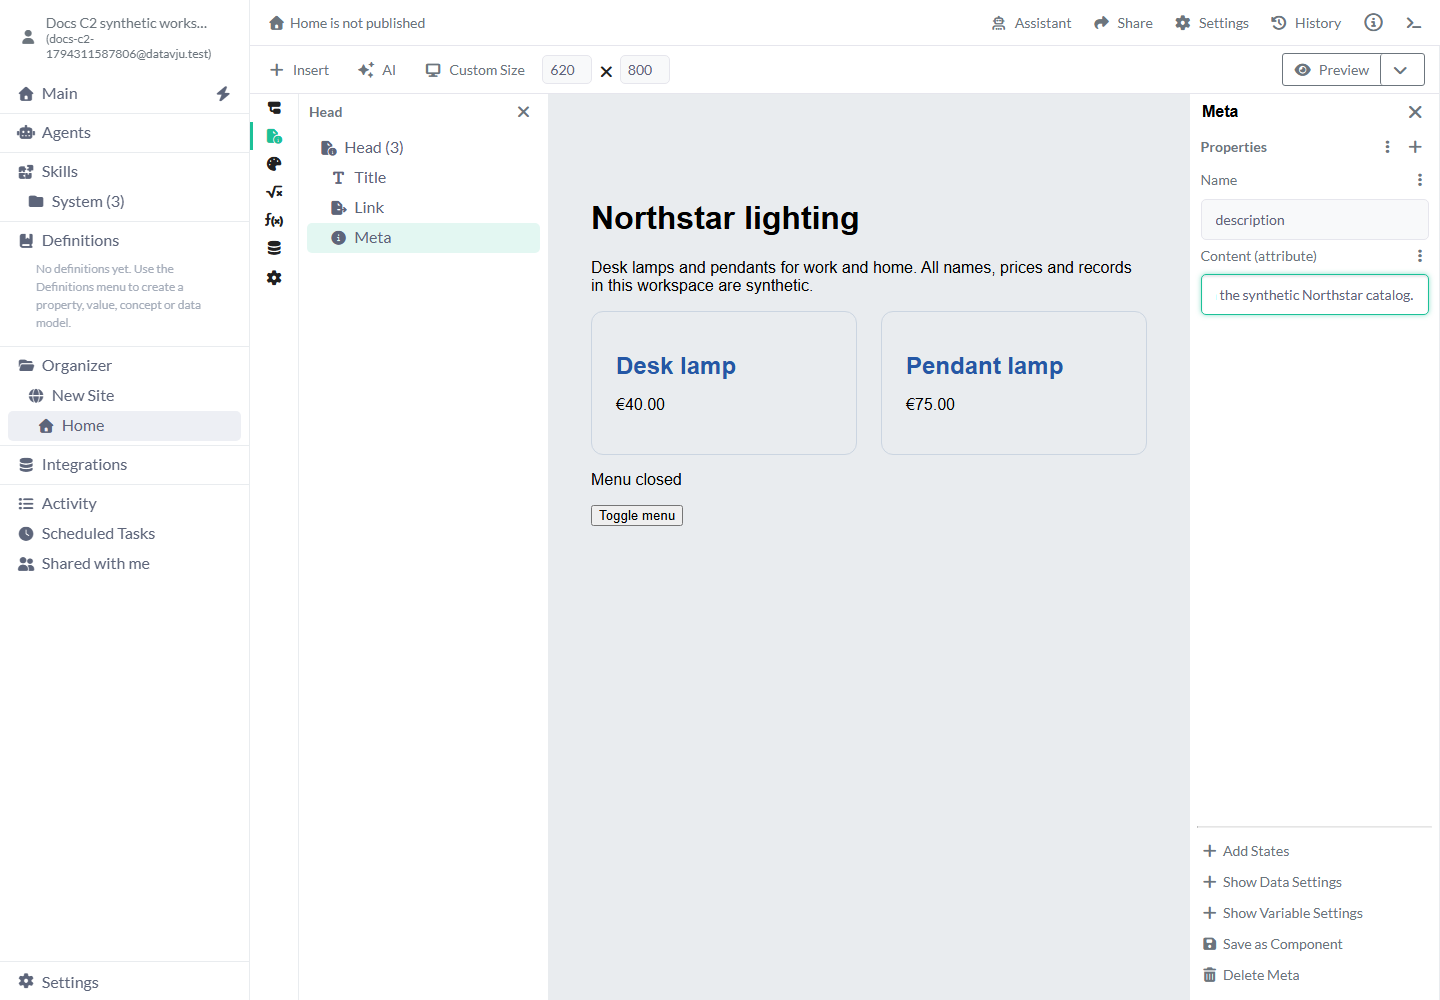
- Open Head's menu and choose Add Meta.
- Select the new Meta element and choose Add property.
- Open Attributes and add Name. Enter description.
- Add Content (attribute) and enter Desk lamps and pendants from the synthetic Northstar catalog.
- Open Preview and inspect the resulting document head. You get a meta element with name description and your description as its content.
Add a canonical URL
Add a document Link with the full public address you prefer for this content.
Use the full intended public address. A canonical link tells readers of the metadata which address you prefer for this content. It does not change the Page's route; configure that through Page and Site.
- Open Head's menu and choose Add Link.
- Select the Link element. Add Href and enter https://northstar.example/lighting.
- Add Rel and enter canonical.
- Check the document head in Preview and Prerender. Both contain your canonical link.
Metadata and document-link settings
Title supplies browser-tab text, Meta supplies named values, and Link declares a relationship to another resource.
- Text on Title: starts empty. Enter one descriptive title for the Page. Example: Lighting guide — Northstar.
- Name on Meta: add it from Attributes and enter the metadata name, such as description or author.
- Content (attribute) on Meta: starts empty. Enter the value belonging to the selected Name.
- Href on a Head Link: starts empty. Enter the resource's address. This is the Head control; visible Body links use Hyperlink.
- Rel on a Head Link: starts empty. Enter the link relationship, such as canonical or stylesheet, according to the resource you intend to declare.
- Other attributes: add only attributes applicable to that Head element. For example, an external stylesheet needs the correct Href and Rel together.
Add document styles
Use Add Style in Head for document-level CSS rules. For shared appearance attached to selected elements, start with the Styles guide.
Choose a Style Type, then enter Selector Name. Element Selector uses an HTML element such as body. Class Selector (.) uses a class name such as catalog; ID Selector (#) uses an ID such as hero. Pseudo-class Selector (:) uses a state name such as root, and Pseudo-element Selector (::) uses a generated part such as selection. Enter the name without the prefix displayed by the type.
At Rule (@) offers Font Face, Keyframes and Media. At-Rule Identifier starts unselected; choose the kind you need. Keep document-wide font declarations on the Page; nested reusable Components keep their styles local to their placement and omit nested font-face output.
Add a Head media rule
Use a Media rule when document-level CSS should depend on a browser condition.
Modifier offers None, only, not and and. Media Type offers all, screen and print. Features starts empty; each feature has an initially empty Feature Type and Value. Text features accept a CSS value, such as 600px; list features offer their permitted values. Remove an obsolete feature, condition or rule with its remove control. Use a shared Style's responsive states for an ordinary element-level width change.
- Add a Head Style. Set Style Type to At Rule (@), then At-Rule Identifier to Media.
- In Media Conditions, choose Add Condition. The condition starts with Modifier None, Media Type all and no Features.
- Choose Add Feature. Set Feature Type to max-width, enter 600px in Value and choose Done.
- Return to CSS Rules and choose Add Rule. A new rule starts as Class Selector with Selector Name newSelector and no declarations.
- Set Selector Name to the class used by the target element. Add the declarations this condition should change, then choose Done.
- Inspect the matching and nonmatching widths in Preview and Prerender.
Define animation keyframes
Define named percentage steps, then apply the animation to the intended element.
Use the step's edit control to change it and its remove control to delete it. Keep animation brief and make sure the content remains usable without movement.
- Add a Head Style with Style Type At Rule (@) and At-Rule Identifier Keyframes.
- Enter Keyframes Name, such as fadeIn. The name and Keyframes Steps start empty.
- Choose Add Step. A new step starts at 0% with no Declarations.
- Edit the step, enter Percentage and add the CSS declarations for that point. For example, set Opacity to 0 at 0%.
- Add a second step at 100% with Opacity 1. Choose Done after editing each step.
- Set the target element's Animation to fadeIn 200ms ease-out, then inspect the result in Preview and Prerender.
Configure a font source
The selected Head Link must supply Resource URL so the font-source picker can read its file address.
The font-source picker reads Resource URL. Use Href for an ordinary canonical or stylesheet Link.
- Add a Head Link for the font resource. In Attributes, add Resource URL. Set Resource Location to External and enter the font-file URL. Use Internal when uploading a permitted font file instead.
- Add a Head Style with Style Type At Rule (@) and At-Rule Identifier Font Face.
- Font Face Sources starts empty. Choose the font Link in Select Resource, then use the plus control to add it.
- Inspect its URL and choose Select Format. Formats are OpenType Collection, Embedded OpenType, OpenType, TrueType, WOFF 1.0 and WOFF 2.0.
- Add the font's required declarations, including its family name, and use that name in your Page's Font Family.
- Check the resulting font in Preview. Edit a source URL or use Delete to remove a source when needed.
Add structured scripts
A Head Script uses configured operations, such as setting a local variable before the Page is used.
Set Dataset Filter, Set Dataset Limit and Set Dataset Model use the selected Dataset and their corresponding filter, limit or model fields. Choose the operation before filling its settings. Use Interactions for click, input, focus and other user events.
- Choose Add Script from Head's menu, then select the Script element.
- Use the plus beside Properties and open the Scripts category, shown with the code icon.
- Add Set Variable, then choose a local Variable. In Set Variable Value With, choose Boolean and set Boolean Value to True or False.
- Test the starting variable value in Preview and Prerender.
Examples
Give each catalog Page its own title, summary and canonical address.
Example: a catalog Page
For the synthetic Northstar catalog, set Title Text to Northstar lighting — Desk lamps and pendants, Meta Name to description and its Content to Desk lamps and pendants from the synthetic Northstar catalog. Add Link Href https://northstar.example/lighting with Rel canonical. The editor, Preview and Prerender carry the same three values.
Example: a separate guide Page
On Lighting guide, use Title Text Lighting guide — Northstar and a description such as Compare desk lamps and pendants for different rooms. Give it its own canonical address, https://northstar.example/lighting-guide. Each Page then describes its own content rather than repeating the catalog's title.
Limits and common mistakes
Metadata is saved per Page and reaches the public version when you publish.
- Keep one intended title and one canonical declaration. Remove duplicate Head elements when checking unexpected metadata.
- Use Href for a Head Link and Hyperlink for a visible Body Link.
- Inspect generated Head output after changing attributes. Head elements appear in the document metadata rather than the visible Page body.
- Publish reviewed metadata changes to update the public version. Search services decide whether and how to use that metadata.
- Use the available simple selector types. Universal, descendant and compound Head selectors need capabilities beyond the supported selector subset; shared Styles offer their own targeting controls.
Related articles
Page · Site · Story · Styles · Interactions