
Structure
Structure lets you build a document from named parts called nodes. Use it for a repeatable brief or specification where you want to edit text, numbers and lists separately. You can save the finished document as a Table for use in other tools.
Build a document
A launch brief can keep Audience, Goal and a numeric page count in separately named parts.
- Open the Organizer or destination folder's context menu and choose Create → Structure.
- Choose Insert to open the node selector.
- Hover a node type such as Title and use its plus control to add it.
- Open View and enable Name and Value so you can see the node and edit its content.
- Enter the value in the document, for example
Catalog launch brief. - Open the Nodes tree with the tree icon. Expand Document, then select the intended node to inspect its properties.
- Add the remaining nodes under the intended container and fill their values.
- Choose Save when you want a separate Structure Table of the current document.
Choose a node
Insert offers general data types such as String, Number, Boolean, Object and Array, plus starting parts such as Title, Paragraph, Description, Section, Feature, Specification and Call to Action. Choose String for text, Number for a quantity, Boolean for true/false, Object for named child parts, or Array for repeated items. Choose a named content preset to start with a suitable type and appearance, then add your content.
Choose a genre card such as Business, Product or Technical Documentation to narrow the Insert list. Then use each node’s plus control to add the parts you need.
Node settings
Select a part in Nodes to open its settings. A new String starts empty, a Number at 0 and a Boolean at false. Objects and Arrays start without children. Starting presentation values depend on the inserted node type; for example, Title starts as a String with its title styling. Inspect those values before changing its content.
Choose Object to group named parts, such as a product name and page count. Choose Array for repeated items, such as a list of benefits. Use Multiline when you need a longer paragraph.
- Node name - Meaning: The label of this document part. When to change it: Rename a generic Paragraph to
AudienceorDelivery notes. - Data Type - Meaning: Array, Boolean, Number, Object or String. When to change it: Use Number for a numeric quantity and Array for repeated content. Changing type converts a single value where supported. Unconvertible numeric text resets to 0; switching to Object or Array clears that single value. Inspect it afterwards.
- Description - Meaning: Explains what the node means or should contain. When to change it: Add guidance such as
One sentence naming the intended reader. It is separate from the value. - Value - Meaning: The content you enter, with an editor for the chosen type. When to change it: Enter
Catalog launch brieffor a Title or12for a quantity. - Container - Meaning: Allows a node to contain child nodes. When to change it: Depends on the preset: on for Object, Array, String and Number; off for Title, Paragraph, Boolean and Null. Use a Section to collect a Title and several Paragraphs.
- Multiline - Meaning: Available for String nodes. When to change it: Starts on for Paragraph and off for Title. Enable it for long text; keep a short title single-line.
- Editors - Meaning: Available for Array nodes. When to change it: Starts off. Enable it to add a Table Editor for an Array of Object rows.
- Delete [name] - Meaning: Removes the selected node and all its descendants. When to change it: Remove an unwanted document part after checking its children and content. The document root cannot be deleted here.
View settings
Name, Type, Description and Value are independent presentation toggles. In a fresh document they start off. Enable the information needed for the current edit: Name and Type for structural review, Value for writing, Description for guidance.
If the document looks blank, turn Value on to show the content already saved in its nodes. Turn Name on to see which part you are editing.
Nodes and clipboard actions
The left activity icons open Nodes, Styles and Columns. In Nodes, select a parent before inserting children. Drag nodes in the tree to change their position; check the resulting hierarchy before saving an output.
Use Paste JSON in a node’s menu to add content from your clipboard: each object property becomes a named child, and each array item becomes a repeated child. Your existing nodes stay in place. Copy as Structured Object copies the selected content as JSON. Copy as Final Cut XML copies XML for a video-editing workflow; check the result in your video editor. Add folder and Copy Node are not available yet.
For a single-line String, the Value field’s menu offers Set as NULL, Add Organizer Id and Upload Image. These replace that node’s value with null, the chosen Dataset’s identity, or the uploaded image reference. They do not add a new document part.
Document Styles
Choose Styles, then a style used by your inserted nodes. Editing a style changes the presentation of nodes using that style. The available properties depend on the style; there is no general add-property control here.
- Color - Starting values and effect: Heading 1 and Normal Text start at #333. Example change: Use #2457A6 for a blue heading.
- fontFamily - Starting values and effect: Heading 1 and Normal Text start at Times New Roman. Example change: Enter Arial for a different font family.
- Font Size - Starting values and effect: Heading 1 starts at 2.5em; Normal Text at 1em. Example change: Enter 2em for a smaller title.
- Font Weight - Starting values and effect: Heading 1 starts bold; Normal Text normal. Example change: Use bold for emphasis.
- Text Align - Starting values and effect: Starts left for those text styles. Example change: Enter center for a centered title.
- Margin Top, Margin Bottom - Starting values and effect: Only appear when stored on that style; use CSS lengths. Example change: Enter 1em for vertical spacing.
- Delete [style] - Starting values and effect: Removes the selected style. Its nodes remain in your document. Example change: Check which nodes use it before deleting it.
Array Table Editors
An Array can have a Table Editor when its direct children are Objects. Each Object becomes one row; its named children provide the cell values. Put each repeated item in an Object under the Array so the Table Editor can show it as a row.
Use the gear’s editable heading to rename Table Editor. Use a column’s pen to edit its Title and Path, or its cross to remove it. Delete [editor title] removes the editor configuration. A missing path shows a disabled empty cell; choose a child containing text, a number or a Boolean for an editable cell. Options → Copy as XML copies the configured table content. Cell edits update the original node values.
- Select the Array in Nodes and turn Editors on.
- Use the plus beside the Structure tab to add Table Editor.
- Open the new tab’s gear and choose Add Column.
- Replace the default Title of New Column and set Path, which starts empty.
- Enter a child’s exact name in Path. For example, Benefit finds that child in each row; Product.Name finds Name inside Product. Choose Done.
- Open Table Editor to edit String, Number or Boolean cells.
Output Columns
Choose Columns to inspect the saved output fields. The starting fields are Name, Structure, Content and Created; their order and visibility controls are currently disabled. Choose Markdown to add ContentAsMarkdown, or Structured Object to add ContentAsStructuredObject. Each add control becomes disabled once its field is present.
Structure retains the full document configuration. Content retains the named node hierarchy and values. The two optional fields provide separate text or object copies for tools that need them.
Save a Structure Table
Save creates a one-row Structure Table beside the document, named from the Structure item followed by : Content. Inspect its nested Content and any optional output fields. Keep editing the Structure when the brief changes. Use its saved Table when another tool needs to read the finished content.
- Save as Structure Table - Effect: Same new Table behavior as Save.
- Save as Structure Table to.. - Effect: Choose the destination folder for the new Table.
- Replace Structure Table - Effect: Replace an existing Structure Table with the current output. Check the target first.
- Append to Structure Table - Effect: Add the current document as another row in an existing Structure Table. Your Table gains a document row while its existing rows stay in place.
- Download Model - Effect: Download the Structure as a Model file, a saved bundle of Datavju items for reuse.
- Create Model Snapshot - Effect: Create Model Snapshot is not available yet.
Generate a document structure
Open the sparkles icon beside the selected document or node’s header to open Generate. Input starts empty; describe the hierarchy you want, for example a launch brief with Audience, Goal and Delivery sections. Datavju chooses the AI model automatically.
Use Web Search starts off and enables a web-search tool when turned on. Use Dataset starts off; including Dataset content is not available yet. Choose Generate only when you intend to rebuild the document: the operation uses the current names, types and descriptions, then immediately replaces the structure from its response. Generation can remove the values you have already written. Save a Table of work you want to keep before generating.
Examples
Use the editing steps above to show Name and Value, then build a launch brief, keep a page count numeric and edit repeated benefits.
Write a launch brief
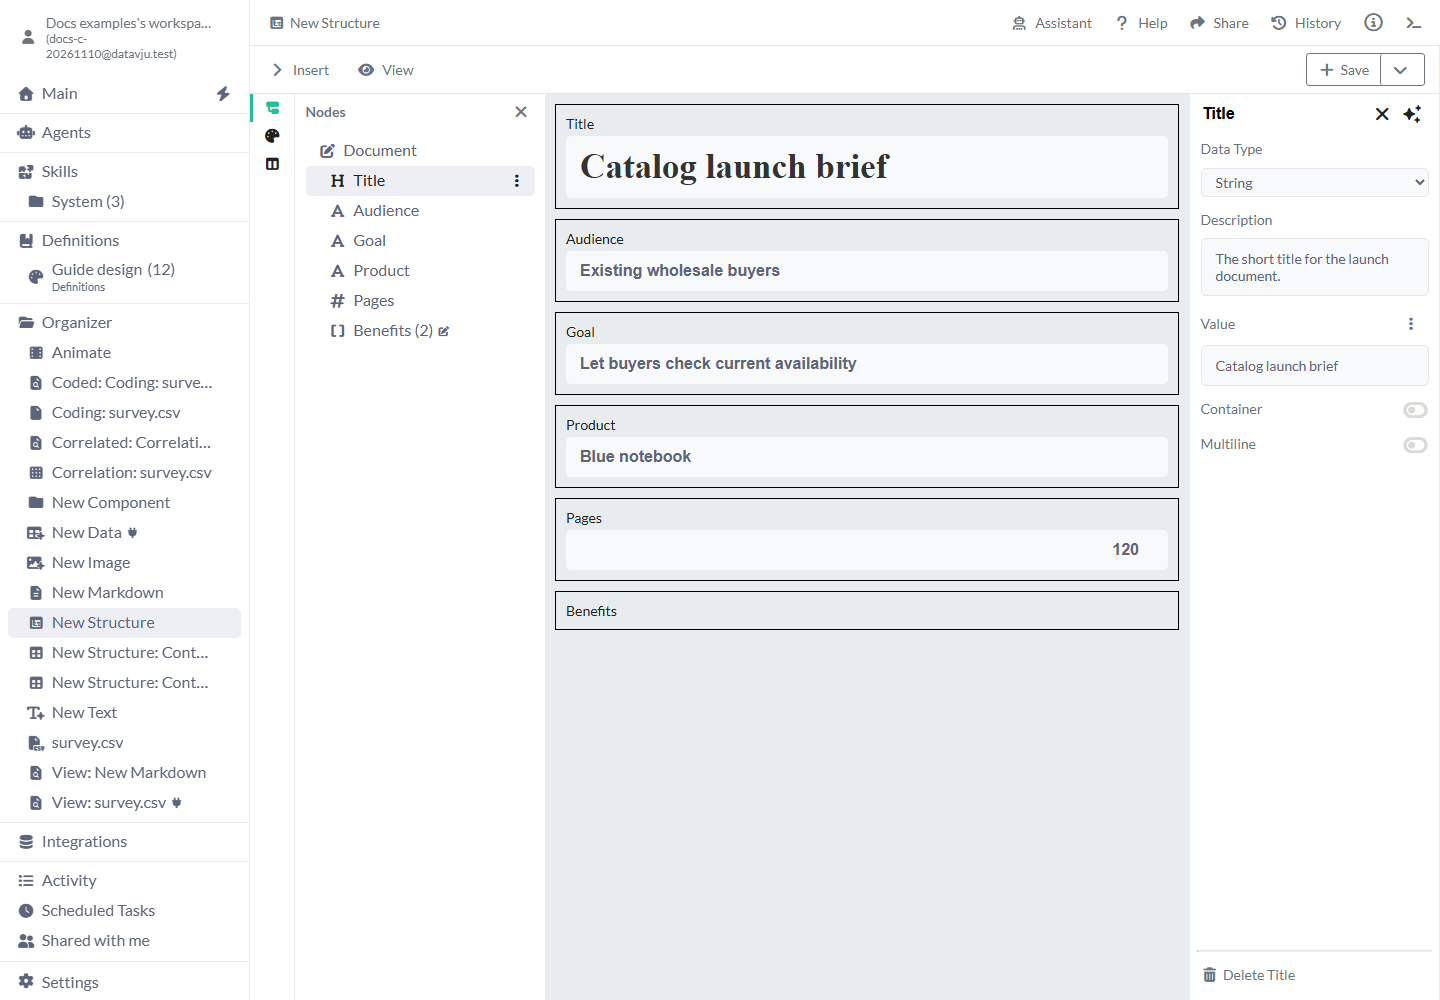
Use a Title for the brief’s name and separate String parts for Audience and Goal.
- Insert Title and enter
Catalog launch brief. - Select Document as the parent and insert Paragraph.
- Give that paragraph the name
Audience, descriptionWho the launch is for, and valueExisting wholesale buyers. - Add another Paragraph named
Goalwith valueLet buyers check current availability. - Save a Structure Table and inspect its Content.
- Open the saved Table and confirm that Content has separate Title, Audience and Goal parts.
Keep a specification numeric
Create a specification with a String part Product containing Blue notebook and a Number part Pages containing 120. Inspect Data Type on each node before saving. Save Pages as Number so other data tools can calculate with it. Keep the unit in its Description.
Group repeated benefits
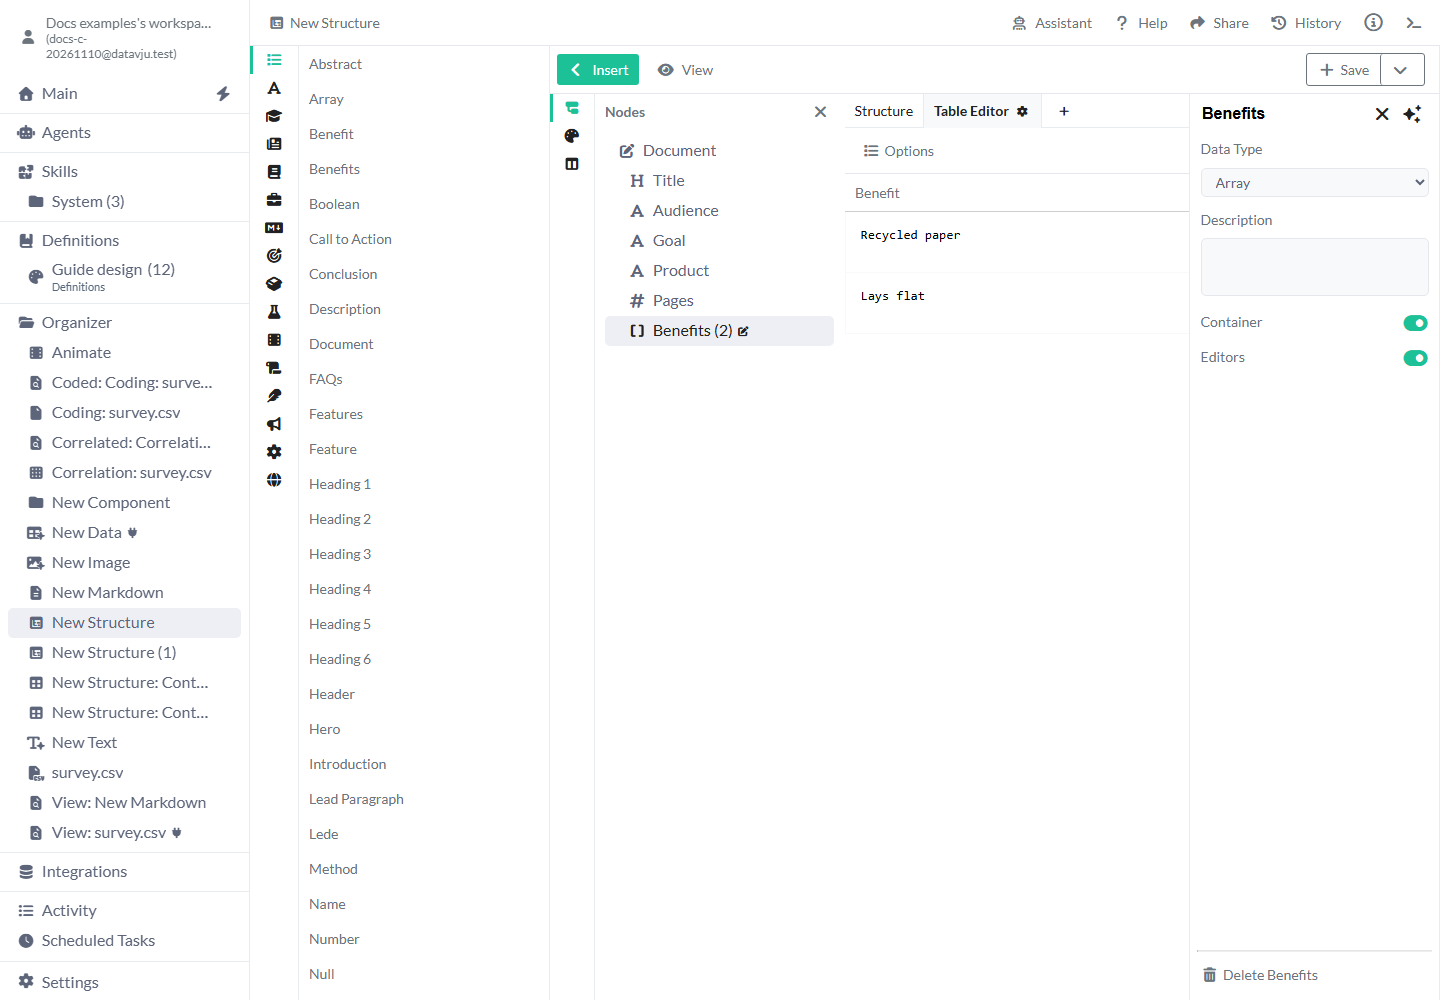
Use an Array named Benefits with two Object children. Give each Object a String child named Benefit, with values Recycled paper and Lays flat.
For a quicker typed import, select Document and use Paste JSON with an object containing a Benefits array of those two objects. The pasted content adds to the rest of your brief.
- Select Benefits, turn Editors on and add Table Editor.
- In its gear, choose Add Column and set Title and Path to Benefit. Choose Done.
- Open Table Editor. It shows the two benefit values as separate editable rows.
- Save a Structure Table and inspect Content to confirm both benefits.
{
  "Benefits": [
    { "Benefit": "Recycled paper" },
    { "Benefit": "Lays flat" }
  ]
}
Limits and common mistakes
- Choose a genre to filter the list, then use Insert to add content.
- View toggles can hide names and values. Check them before concluding that your document is empty.
- Select the parent before inserting. Visual proximity does not establish the hierarchy.
- To update a previously saved Table, choose Replace Structure Table and select that Table.
- Use Markdown for a plain text document and Page to build an interface for readers.
- Generation rebuilds the whole document without an Apply/Discard stage and can remove existing values. The manual node workflow does not depend on running it.
- Use Dataset, Add folder, Copy Node and Create Model Snapshot have the current limitations described above.
- Check Styles when you create another document in the same browser session; earlier style changes can carry over.
Related articles
- Markdown - edit a plain-text document.
- Data generation - generate schema-constrained data.
- Page - build a rendered interface.