
Animate
Animate creates and edits SVG animations, made from groups of shapes and editable paths. Use it for a moving diagram or illustration whose geometry and timing you want to revise. It saves the animation in Organizer and can download SVG, PNG or MP4 files.
Open an animation
A new animation has an empty Scene Root group on a 1280 × 720 canvas. Use AI Create to add artwork, then edit its paths and timing.
- Open the Organizer or destination folder's context menu and choose Create → Animate.
- Select SVG Root to open the canvas settings.
- Expand SVG Root to see Scene Root and any groups or paths in an existing animation.
- Select a group or path to inspect it. A sequence lane appears below the canvas when that element has an animation.
Canvas and editor controls
Select SVG Root before changing the canvas. Its dimensions describe the saved image; Zoom changes only how large it appears in the editor.
SVG Root
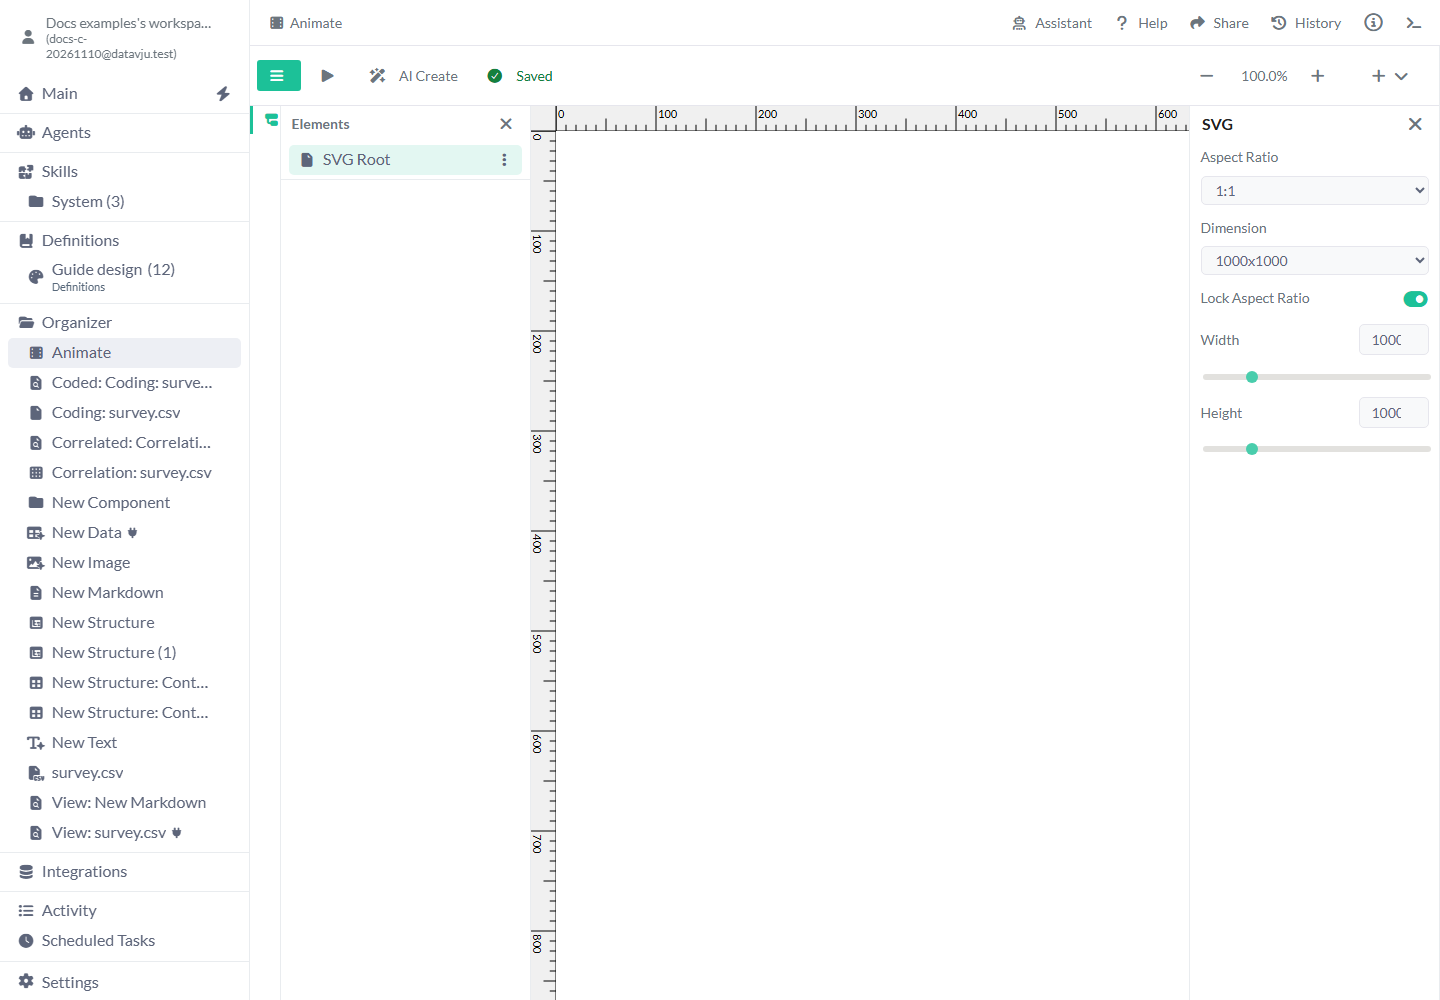
The canvas starts at Aspect Ratio → 16:9, Dimension → 1280x720 (HD) and Lock Aspect Ratio on. Use the presets below for a square or wide destination.
- Aspect Ratio - 21:9, 16:9, 3:2, 4:3 or 1:1. The ratio adjusts one dimension to match the other. Choose 1:1 for a square card.
- Dimension - A size for the selected ratio. 21:9 offers 640x272, 1024x435, 2560x1080 (Ultrawide HD), 3440x1440 (Ultrawide QHD), 5120x2160 (Ultrawide 5K). 16:9 offers 640x360, 1280x720 (HD), 1920x1080 (Full HD), 2560x1440 (QHD), 3840x2160 (4K UHD). 3:2 offers 720x480, 1080x720, 1440x960, 2160x1440, 3000x2000. 4:3 offers 800x600, 1024x768, 1280x960, 1600x1200, 2048x1536. 1:1 offers 500x500, 800x800, 1000x1000, 1500x1500, 2000x2000.
- Lock Aspect Ratio - Proportion locking while typing dimensions is not available yet. Turn this off to enter Width and Height independently, or use Aspect Ratio and Dimension presets.
- Width, Height - Start at 1280 and 720. The controls show 0–5000 with slider steps of 10. Keep both positive so the canvas has a visible area.
Navigate the editor
The sidebar button shows or hides Elements. Expand a group to see its paths. Selecting a different element clears the previous sequence or keyframe selection.
Zoom starts at 100%. Use minus or plus to change it by 10 percentage points, or choose the percentage to open Zoom. Use 10% or above; zooming changes your editor view and leaves the saved canvas dimensions in place. The Play control and adding elements from the tree menu are not available yet. Animations run in the preview as you edit.
Edit groups and paths
Groups keep related shapes together. A path describes a shape using SVG commands, such as Move To, Line To and Cubic Bezier Curve To. Select the group to move several shapes together, or its path to change the outline.
Group settings
New groups have Use SVG Transform Attribute and Use CSS Transform off. Turn on the representation you need to reveal Scale X, Scale Y, Translate X and Translate Y. Existing artwork shows its saved values.
Scale 1 keeps the original size; 2 doubles it. Translation moves the group, for example Translate X 20 moves it horizontally by 20 units. Link Scale starts off and changes the other scale in proportion when enabled. Link Translate also starts off; use nonzero translation values before linking them and check both axes after changing either. Turning a transform representation off removes its transform values.
Where a group has child shapes with position coordinates, X and Y move those coordinates together. These start at the group's existing position. Compare the preview after each change.
Path settings
Raw Path shows the selected path's saved commands. Edit it directly or use Path Commands to change each command's numeric parameters. The copy icon beside Path Data (d attribute) copies the path text.
Convert to Absolute Path replaces relative coordinates with absolute ones and is disabled when the path is already absolute. Shift Start Point uses the left/right controls to move the starting command around a closed path; it is disabled for open paths. Shift Path Coordinates starts with x and y at 0. Enter a horizontal or vertical offset and choose Apply Shift to move the path's coordinates.
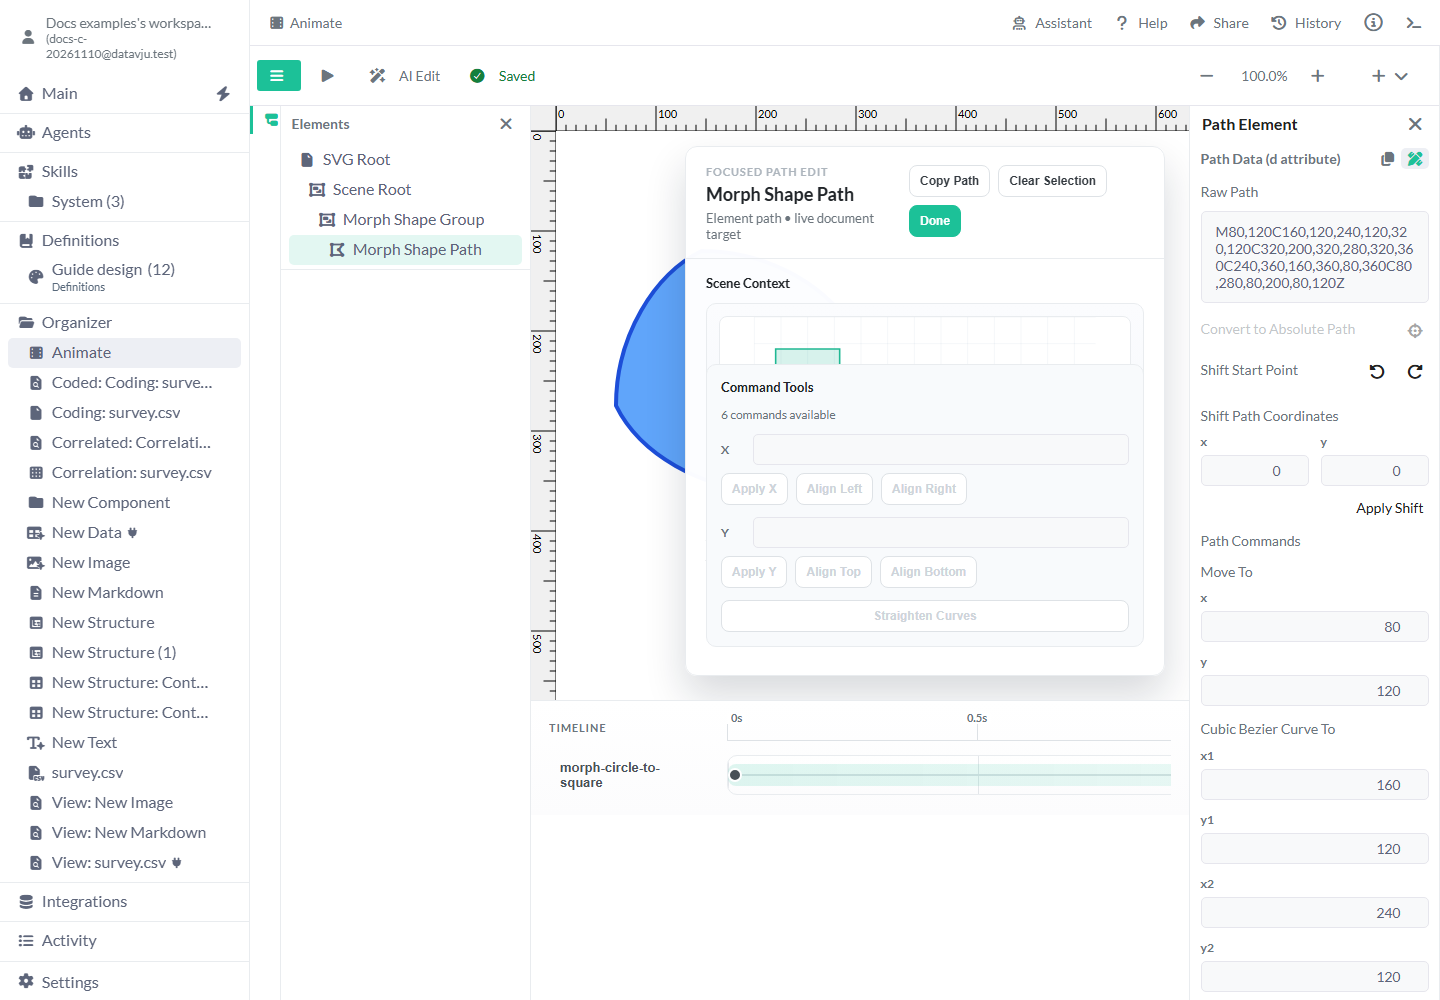
The ruler icon opens a focused path preview. Copy Path copies its current outline, Clear Selection clears any command-card selection and Done closes it. Command-card selection and its Apply X, Apply Y, alignment and Straighten Curves controls are not available yet in smaller editor windows. Use the numeric Path Commands fields in the main inspector to edit individual coordinates.
Sequence and keyframe settings
A sequence holds the timing and changing values for an animation. Several elements can use the same sequence. New empty documents have none; select an existing lane to inspect its saved values.
Select a keyframe dot to edit Time, in milliseconds from the sequence start; it is kept within 0 and Duration. Opacity changes visibility: 0 is transparent and 1 is fully visible; clear it when that frame should not set opacity. Transform accepts a transform string such as translate(20px, 0px). Raw Path appears when that keyframe changes the path outline. Its path tools edit that keyframe's outline, while selecting the path element edits the base outline. Other keyframes keep their own values.
- Name - Read-only sequence name. Use it to identify the motion you are editing.
- Duration - Length in milliseconds: 1000 is one second, 2000 is two seconds. Increasing it leaves keyframe times unchanged; move the final keyframe too when stretching a motion. Shortening it clamps later frame times to the new end.
- Delay - Wait before the motion, in milliseconds. An empty value means no delay; use 500 for half a second.
- Iteration Count - Repeat count, such as 2, or
Infinityfor continuous repetition in the preview. - Timing Function - Timing curve, such as
linearorease-in-out. Change it to control how the motion accelerates. - Relation Summary - Read-only text showing where the sequence is used. Check it before editing a sequence shared by several elements.
Create or revise with AI
AI Create builds one SVG scene of groups and paths. AI Edit can use your selected element, sequence or keyframe to focus a revision. The saved scene changes when you apply the proposal.
Pending edits save before the request starts. Keep requests to one scene using groups, paths and their animation timing. Visible text, gradients, filters, masks, clipping paths, multiple scenes and product-screen mockups are outside the current AI scope. You can ask for named groups so they are easier to select later; their names stay in the tree.
- Choose AI Create on an empty document or AI Edit on existing artwork.
- For an edit, select the element, sequence or keyframe you want to change first.
- Describe the scene or revision, then choose AI Create or AI Edit in the prompt.
- Review the progress and proposal summary.
- Choose Apply to accept it or Discard to keep your current document.
Save and download
Edits save automatically. Wait for Saved before closing the document. Saving... means a write is underway; Save error means the latest changes have not been saved. Keep your current document open while checking the message, especially if another tab edited it.
Open the plus-and-chevron menu for Download SVG, Download PNG or Download MP4. SVG keeps vector artwork; PNG is a single image. The size selector in this menu changes MP4 output size and starts at the canvas's current preset. MP4 uses the largest Delay + Duration across all sequences for its clip length; repeated iterations do not multiply that exported length. Review the downloaded clip before using it. Save as SVG is not available yet.
Examples
Start with a canvas preset, then create an editable shape animation and revise its timing. AI results can vary; inspect the proposal's actual names and values before editing them.
Prepare a square illustration
Use a square canvas for a card illustration.
- Create an Animate item and select SVG Root.
- Choose Aspect Ratio → 1:1 and Dimension → 1000x1000.
- Check Width and Height both show 1000, then wait for Saved.
- Reopen the document to check its saved dimensions before adding artwork.
Create a shape morph and lengthen it
A morph changes one path outline into another over time. Use the sequence and final keyframe together to control how long the transition takes.
- On an empty Animate item, choose AI Create and enter
Create a delayed circle morphing into a square. - Choose AI Create in the dialog and inspect the proposal summary. Choose Apply, then inspect the resulting artwork on the canvas.
- Expand the groups and select the animated path, then its sequence lane.
- Set Duration to 2000. Select the final keyframe and set Time to 2000 too.
- Review the transition, inspect Relation Summary for shared uses and wait for Saved.
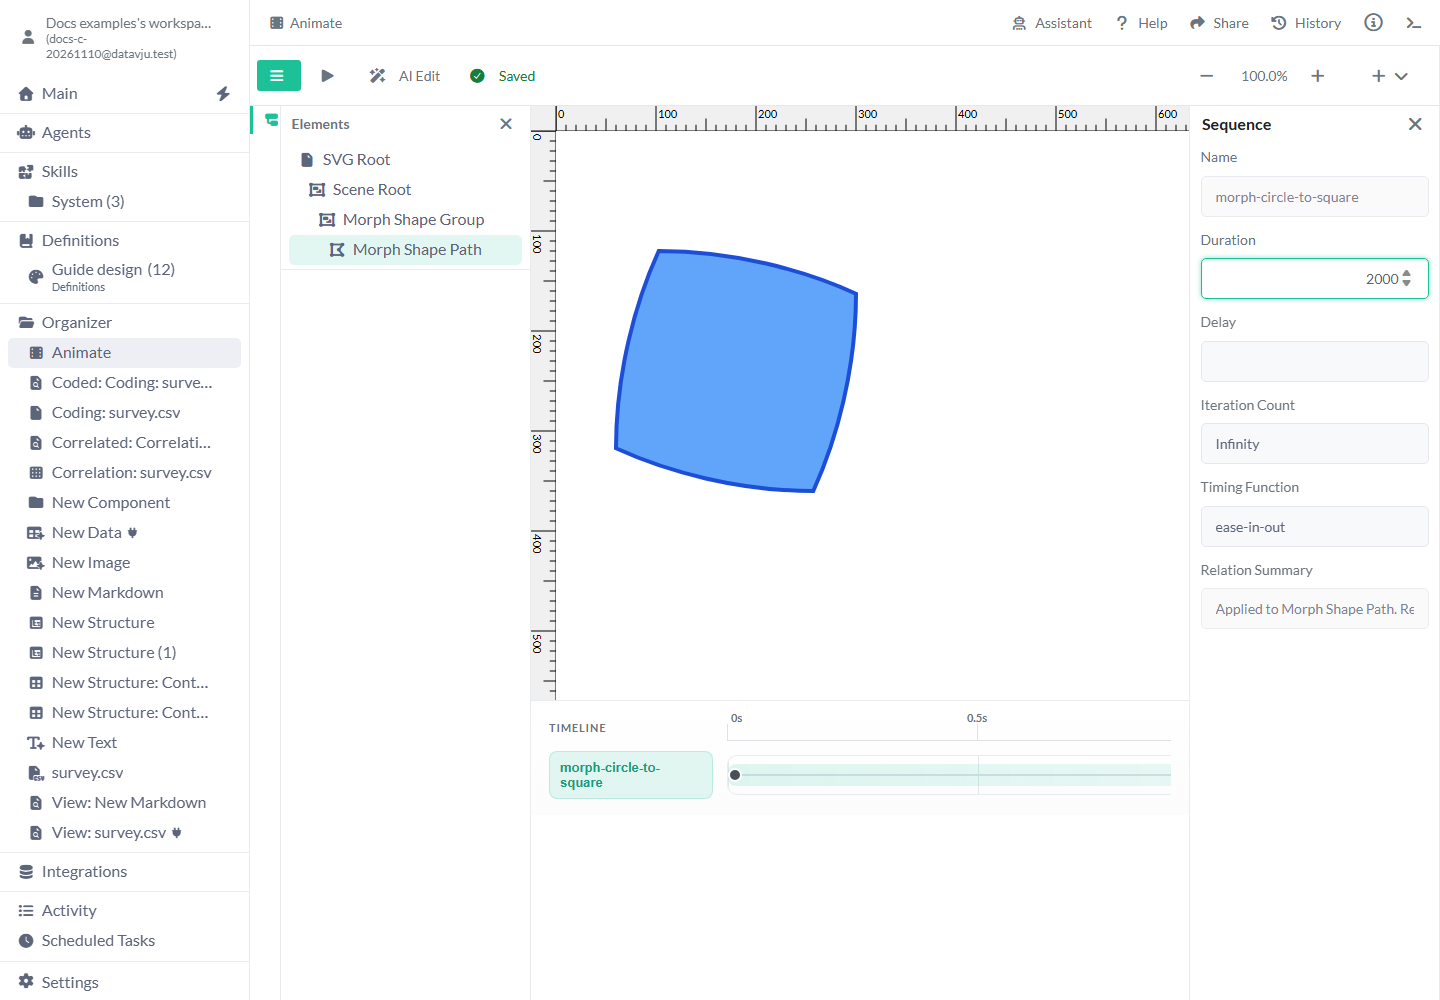
In the synthetic example, the proposed Morph Shape Path had a 1200-millisecond sequence. Changing both values to 2000 extended the transition to two seconds.
Move a path 20 units to the right
Shift a static outline without rewriting every coordinate. For animated outlines, select the keyframe you need to change instead of only changing the base path.
- Select the path. If a keyframe remains selected, select another element and return to the path.
- Under Shift Path Coordinates, enter x 20 and y 0.
- Choose Apply Shift and check Raw Path. A starting point
M 60 120becomesM 80 120. - Inspect individual coordinate values under Path Commands in the main inspector. Open the ruler preview if useful, then choose Done to close it.
Limits and common mistakes
- Check Time as well as Duration when changing animation length; both use milliseconds.
- A shared sequence changes every element using it. Read Relation Summary before editing.
- Path keyframes can override the base outline. Edit the keyframe when that is the visible shape you want to change.
- Use presets for a precise canvas proportion; numeric proportion locking is not available yet.
- Zoom, open prompts and focused path-editor selection last for the current session. Reopening restores the saved artwork and timing.
- Review MP4 length and the downloaded result when your animation uses delays or repeated sequences.